Sunday, May 20, 2012

Tortellini and Tomato Salad

Tortellini-and-Tomato Salad Recipe


Photo and Recipe Source (via Pinterest)

Ingredients:
2 9-oz packages refrigerated cheese-filled tortellini
1/2 cup olive oil
1/2 cup freshly grated Parmesan cheese
3 tablespoons lemon juice
2 garlic cloves
1 teaspoon Worcestershire sauce
1/2 teaspoon salt
2 cups baby heirloom tomatoes, halved
1 cup fresh corn kernels
1/2 cup thinly sliced green onions
1/2 cup chopped fresh basil
Salt and pepper

Directions:
1. Prepare tortellini according to package directions.
2. Meanwhile, process olive oil and next 5 ingredients in a blender until smooth.
2. Toss olive oil mixture with cooked tortellini, tomatoes, and next 3 ingredients. Season with salt and pepper to taste.

Notes: My summer taste buds bloomed early this year, so our grilling season is already in full swing. Last night we had kabobs, and this was a perfect complementary side dish! Hearty weight with a very light flavor.  For extra veggies, I added cucumbers, olives, and broccoli. I just ate the leftovers for lunch today, and it was equally as delicious cold. What a great find!

Friday, May 18, 2012

Grilled Ham, Swiss and Asparagus Sandwiches

Source: Mostly me, but I was inspired by these crepes I made last week

Ingredients:
2 slices bread
2-3 slices deli ham
2-3 slices swiss cheese (enough to cover the bread)
4-5 asparagus twigs (is that what you call them?), cut in half
your favorite mustard (I used this homemade honey mustard)
butter

Directions:
Spread a thin layer of mustard on each slice of bread.  Layer the ham on one mustard-sided slice of bread, then the asparagus, then the cheese and top the sandwich off with the other slice of bread, mustard-side down.  Butter the top, outside slice of bread and place the sandwich butter-side down on a hot (but not too hot - the key is to grill it nice and slow) griddle or frying pan.  Butter the other side (now on top).  Grill till you've got a lovely golden brown bread and soft, melty cheese.  Devour and enjoy!

Notes:
I eat a lot of grilled sandwiches around here - cheese, tuna, ham - and when I had some leftover asparagus from the crepes last week, I decided to sass up my boring ham 'n' swiss with a few spears (that's what they're called!).  I've eaten one every day for the last three days, they're just that good.  I know it's kind of a simple "recipe" but I just had to share because it's my new favorite lunch.

Thursday, May 17, 2012

Banana Bread Muffins

Source: the Better Homes and Gardens New Cookbook (14th Edition)

Ingredients:
2 cups all-purpose flour (I subbed half for whole wheat)
1 1/2 teaspoons baking powder
1/2 teaspoon baking soda
1/4 teaspoon salt
1/4 teaspoon cinnamon (I probably added closer to 1/2 teaspoon)
1/8 teaspoon ground nutmeg
2 eggs, beaten
1 1/2 cup mashed ripe bananas (5 medium) (I didn't measure - just mashed up four bananas I had in my freezer)
1 cup sugar (less is fine - I use a scant 2/3 cup, half white/half brown sometimes when I'm feeling fancy)
1/2 cup cooking oil or melted butter or margarine (it works great with half oil/half applesauce)
1/4 cup walnuts (I didn't have any, but I did add some chocolate chips to half the batch - and both together are spectacular!)
1-2 Tablespoons flax meal, optional (for some reason I really like to add this to my banana bread)

Directions:
Preheat oven to 350F.  Grease bottom and 1/2 inch up the sides of one 9x5x3-inch or two 7.5x3.5x2-inch loaf pans; set aside.  (As you can tell by the title, I made mine into muffins - just grease your muffin tins or prepare the paper liners for 22-24 muffins.)

In a large bowl combine flour, baking powder, baking soda, salt, cinnamon and nutmeg.  Make a well in the center of the flour mixture; set aside.

In a medium bowl combine eggs, banana, sugar, and oil.  Add egg mixture all at once to flour mixture.  Stir until just moistened (batter should be lumpy).  Fold in walnuts (or chocolate chips).  Spoon batter into prepared pans.

Bake for 55-60 minutes (large bread pan), 40-45 minutes (smaller bread pans) or 15-20 minutes (muffin tins) or until a toothpick inserted in the center comes out clean.  (If necessary, cover loosely with foil for the last 15 minutes of baking to prevent overbrowning - not necessary for the muffins, just a loaf.)  Cool in pan on wire rack for 10 minutes.  Remove from pan.  Cool completely on rack.  Wrap; store overnight before slicing (yeah, right!).

Notes:
I really love banana bread, and I had gathered quite a few too-brown bananas over the last few weeks to finally have enough to make a batch.  While in Virginia, Victoria made a batch of banana bread into muffins, and remembering how much I liked them, I decided to veer from my normal recipe and try hers (at least I think it's the same one she used).  I might not ever go back!  These were so moist and light and just down-right good.  And they didn't have any hint of an aftertaste that so often I get when I make banana bread.  (Maybe that's only because they were in muffin liners instead of a greased pan, or maybe because they're not cooked as long as muffins so they don't get too brown on the edges . . . I don't know.  I just know I liked 'em.  A lot.)

Tuesday, May 15, 2012

Homemade Hamburger Buns

Source: Taste of Home, via Pinterest


Ingredients:
2 Tablespoons active dry yeast
1 cup plus 2 Tablespoons warm water (110° to 115°)
1/3 cup vegetable oil
1/4 cup sugar
1 egg
1 teaspoon salt
3 to 3-1/2 cups all-purpose flour (I subbed about 1/2 - 1 cup whole wheat)

Directions:
In a large bowl, dissolve yeast in warm water. Add oil and sugar; let stand for 5 minutes. Add the egg, salt and enough flour to form a soft dough.

Turn onto a floured surface; knead until smooth and elastic, about 3-5 minutes. Do not let rise. Divide into 12 pieces; shape each into a ball. Place 3 inches apart on greased baking sheets (and I liked it better if I slightly flattened the dough ball so it made more of a bun shape rather than a round roll when cooked).

Cover and let rest for 10 minutes (I found they were a little less heavy and dense if I let them rise for about a half hour). Bake at 425° for 8-12 minutes or until golden brown. (I've found that shiny cookie sheets work better than dark, nonstick pans for making lovely brown buns.)  Remove from pans to wire racks to cool.

Yield: 1 dozen.

Notes:
I was in the mood for burgers one night, but we didn't have any buns.  Luckily I had seen this recipe on Pinterest just a few days before (maybe that's what sparked the burger craving in the first place) and since it was advertised to be quick and easy, I decided to give it a go.  Yum.  Not quite like Lee's Marketplace's fresh french bread hamburger buns that my mom used to get back home . . . but not bad at all.

Monday, May 7, 2012

Asparagus, Ham and Swiss Crepes

Source: Mel's Kitchen Cafe
Yield: 10 crepes

Ingredients:
for the crepes:
2 large eggs
1 1/4 cups milk
1 cup all-purpose flour
2 Tablespoons vegetable oil or melted butter (I went the oil route)
1/4 teaspoon salt

for the filling:
8 ounces chopped, cooked ham (I just used deli sliced ham)
1 1/2 cups shredded swiss cheese
pinch of black pepper
20 asparagus spears, cut in half (If you like asparagus, you might want to use more)

for the sauce:
4 Tablespoons butter
1/4 cup all-purpose flour
1 cup low-sodium chicken broth
1 cup low fat milk
2 Tablespoons stone-ground mustard (I just had the plain-jane yellow stuff, and it was good, but I'm sure stoneground would be even better!)
salt and pepper, to taste

Directions:
for the crepes:
In a blender or large bowl using an electric mixer (I used the blender and it worked like a charm - it even fit a double batch!), combine the eggs, milk, flour, oil (or butter) and salt. Blend or mix on high until the ingredients are well combined. Cover the batter and chill in the refrigerator at least 1 hour or up to 24 hours. This helps the gluten to relax, making the crepes even more tender.  Note: If you chill the batter for more than 1-2 hours, go for the oil option, as the butter tends to harden and clump up if refrigerated for longer than a couple hours.

When ready to start cooking the crepes, heat a 10-inch nonstick skillet over medium heat for 2-3 minutes. Spray the bottom and sides of the skillet with nonstick cooking spray. The skillet should sizzle like crazy. You want it piping hot before you pour in the crepe batter. Quickly whisk the crepe batter to recombine, then measure out 1/4 cup of the batter. Tilt the skillet off the heat and pour the batter to one side of the skillet, immediately twirling the skillet to coat the bottom with the batter.

Set the skillet back on the heat and cook the crepe until the edges begin to brown, about 1 minute. Loosen the crepe around the edge with a heat-proof spatula and gently (but quickly!) pick up the edges of the hot crepe with your fingers and give it a fast flip. Cook the other side for 30 seconds or so until lightly golden brown and cooked through. Transfer the crepe to a wire rack. The key is to keep the skillet sizzling hot without burning the crepes – you might need to moderated the heat of your stovetop between medium and slightly above that to keep the crepes cooking quickly without burning. You should hear an audible sizzle when you pour the crepe batter into the skillet but if you hear a sizzle with accompanying smoke – the skillet is probably too hot.

Repeat with remaining batter (spraying the skillet with cooking spray every 2-3 crepes), stacking the crepes as they finish cooking.

(Mel says: To store leftover crepes (or to make in advance): once the crepes have cooled, stack them between pieces of parchment or wax paper. Wrap the stack of crepes in plastic and store them in a resealable plastic bag in the refrigerator for several days or for up to 2 months in the freezer. Completely thaw frozen crepes before carefully pulling them apart.  I just stacked them up and put them in a ziplock bag in the fridge (sans parchment or wax paper) and they seem to do just fine.)

for the filling:
In a medium bowl, toss together ham, swiss cheese, and pinch of black pepper. Spoon 1/4 cup of ham/cheese mixture down the center of each crepe and top with 2 asparagus spears, cut in half (so you’ll have four pieces of asparagus per crepe -I added more because I like asparagus). Roll up enchilada-style. Arrange the crepes seam-side down on a lightly greased baking sheet (or 9x13 casserole dish - just squeeze 'em in). Bake the crepes at 400 degrees for 10-12 minutes, until the cheese has melted and the crepes are golden brown.

for the sauce:
While the crepes are baking, melt butter in a medium saucepan. Whisk in flour and cook for 1-2 minutes, stirring constantly. Slowly whisk in chicken broth and milk until the mixture is smooth. Bring the mixture to a low boil, stirring often, and simmer for 3-4 minutes, until thickened. Whisk in stone-ground mustard (use more according to taste) and add salt and pepper to taste. Serve the warm ham/asparagus crepes topped with the sauce.  (We just poured the whole pan of sauce over all the crepes in the casserole dish, and I felt like that was way too much sauce for the amount of crepes - they looked like they were swimming!  Gregg loves sauce, so he didn't mind, but next time I think I'll just spoon sauce over individual crepes as they are served.)

Notes:
Crepes are something that I did not grow up with at home.  I think the first time I had them was when I was in college with my friend Christine when we visited her sister and nephew in St. George one summer.  Since then, I've eaten them a handful of times, but I have never attempted making them.  Till yesterday.  What the heck was I waiting for?  They are NOT hard.  Not hard at all.  And there are so many delicious things you can do with them!  I made a double batch of the crepe batter so I could make a batch of these savory ones and save a batch for some "desserty" ones for later.  We piled ours with fresh strawberries, raspberries, vanilla yogurt, peanut butter, bananas, chocolate chips, crushed pineapple, lemon curd, and chocolate syrup (not all together!) and it was quite the fun little feast.  If you've never attempted crepes by yourself, don't be like me - make these today!

Wednesday, May 2, 2012

Crunchy Coconut Lime Chicken

Source: Family Feedbag

Ingredients:
3 lbs chicken drumsticks (about a dozen) (I just used chicken breasts cut into "tenders" - and not 3 lbs worth, so I just kind of reduced the amounts of the following proportionately)
zest and juice of 1 lime
3/4 cup shredded sweetened coconut
3/4 cup panko bread crumbs (I just used plain ol' dry bread crumbs from leftover heels of bread that never got eaten)
1 tsp salt
1/2 tsp chili powder
2 eggs
1/3 cup all-purpose flour

Directions:
Start by zesting the lime and setting the zest aside for later.  Lay the drumsticks (or tenders) snugly in a 9x9 baking dish and juice the lime over the chicken.  Cover the chicken and return it to the fridge to marinate for 3 hours (I only had about 2 hours and it was plenty limey for me).

When ready to cook, preheat the oven to 400 degrees F.  In a large shallow bowl, combine the lime zest, coconut, panko crumbs, salt and chili powder and mix evenly.  Beat the eggs in a medium shallow bowl, and add the flour to a second medium shallow bowl.  Coat each piece of chicken first in the flour, then in the beaten egg, then the crumb mixture.  Place the chicken on a parchment-lined (or just sprayed with cooking spray) baking sheet, and bake for about 40 minutes (for drumsticks - for the tenders it only took like 15-20) until the chicken is cooked through and the coating is golden and crunchy.

Notes:
This was quite delicious and really super quick (if you don't count the marinate time).  A little bit tropical and different than our normal chicken fare.  We served it up with a side of sweet potato fries and it made a lovely meal.

Tuesday, May 1, 2012

Circus Animal Chex Mix

Source: Aubrey Bailey, a friend from my Logan student ward


Ingredients:
3/4 box corn chex
3/4 box rice chex
3/4 bag pretzels
1 can roasted almonds or cashews (I didn't add these in my most recent batch because I just didn't feel like paying for them!)
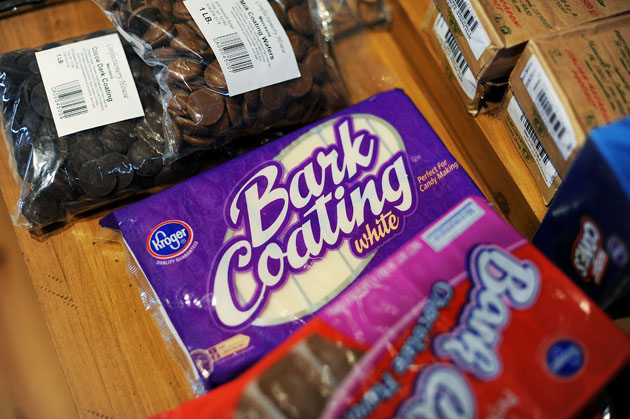
1 lb vanilla flavored almond bark candy coating (looks kinda like this - find it in the baking aisle near the chocolate chips)
sprinkles, optional (but they do make it look more fun!)

Directions:
Dump the cereal, pretzels and nuts (and sprinkles) into a very large bowl (or two large bowls if yours aren't VERY large).  Melt the almond bark according the the package directions (it's super easy and quick in the microwave).  Drizzle the melted candy coating over the dry ingredients and stir quickly to cover everything.  You want to work quickly because the coating will harden if you don't and then you end up with large globs of white chocolate and dry pockets of cereal.  Let the mix rest and harden in the bowl(s) for a few minutes, then if you desire, transfer to ziplock bags (it fills 2 gallon size bags) to transport and store.

Notes:
Aubrey brought this to a RS activity in my student ward a few years ago and I begged her for the recipe, thinking it would make a great road-trip snack as Gregg and I embarked on our first-ever Spring Break adventure in Moab 2 years ago.  When the Blanchard family was heading to Moab for a family reunion last week, I knew that I wanted to make this again to bring along.  It was a hit!